Sunday, October 23, 2016

Open House: Oh My God!

All teachers' favorite day of the year, right? Each year, while preparing for open house, I am always faced with fears and anxiety about what to say. What do they need to hear? What do they want to hear? What should I say?... or what shouldn't I say? How should I say it?

This year, I streamlined my open house and received awesome feedback from my parents. AND it was much less nerve racking and easier to prepare!

Trick? Engage them, make them laugh, and give them markers!

Open House 2016 Schedule 

  1. Initial welcome and paper grab
  2. Mystery reader sign up
  3. Helping hands grab
  4. Find your seat
  5. Read your student note
  6. Explore the classroom
  7. Powerpoint Presentation
  8. Write a note to your student
  9. Final private comments

As the parents slowly fill the classroom, I have them file towards the reading table where each paper they will need is layed out in a row. On the smart board (I am lucky!) I stream pictures of the students so far this year in the classroom. I find that this brings the parent nerves down and gives them something to talk about with each other. And smile about! 

On the reading table, I have 
  • a sign in sheet-so I can be sure who showed up, and which parent(s) in particular from each family
  • a copy of the powerpoint slides (so they don't need to look at me if they don't want to) AND so that they can keep it and bring it home to read when they forget
  • a SHORT summary of the math, literacy, writing, and science programs I use (basic 2-3 sentence summary and overview of topics/skills covered for the year)
  • Mystery Reader sign up sheet and description
On a separate, highly decorated table, I have our helping hands sign and many, many little hand cut outs with labels of supplies we need and wish list items for the classroom

Image result for helping hands in the classroom


Parents can take one (or multiple) hands as a reminder of what they would like to purchase to provide for the classroom.

Our Mystery Readers are parents and family members from the classroom who sign up for a time to come into the classroom and read 1-2 books. They can choose any book from home or arrange to use one of the books from our classroom. It is a perfect way to make the home to school connection more concrete and real. Your Mom reads too?! The students are always unaware of when and who is coming into the classroom so it is a surprise to all! Just don't forget to tell your secretary that it is a surprise so the name doesn't come blaring over the loud speaker!


Next, the parents find their child's seat and are surprised by a "note" written by the student to the parent about what their family enjoys doing. They always write something wonderful about excessive sleeping, tv watching or partying. Never fails to produce laughs :) During this time, they are also encouraged to explore the room and ask questions.


After about ten minutes, I gather everyone back together and go through the slideshow. I have included some of the slides below that I bought from the not so wimpy teacher and absolutely LOVE! 


When I finish going through the slides, I pass out a paper to the parents to fill out and to be left on the desks for the kids to see in the morning. The kids LOVE IT. It makes the fact that their parents cared enough to come more real for them.


                                                                                                                           FREEBIE !


Finally, I end my spiel and pass out a final comments sheet.


Hope this helps ease the pain pleasure of Open House! Enjoy your FALL!!!

and, happy teaching!

Ms. Hendsbee


Classroom Reveal and Kindergarten Organization!

Now that it is October and testing, settling in, and becoming a part of a new school culture is a little bit under control, I can finally share my new classroom! When I found out that I was moving schools this year, I turned my anxiety about all of the boxes, tiny pieces, and hot weather around into thinking it was my chance (FINALLY) to organize my entire classroom correctly! I am SO excited to share it with you all! Hopefully some of my tips and tricks are helpful :)


Here is my meeting area. I always feel like it is very cluttered and so I tried hard to organize and lessen the mish-mosh on the walls. The pink bin directly next to my chair holds math, writing and literacy tools we use or will use each day. Daily lesson materials and quick grabs (flash cards, read alouds, pointers) are all found here.

My favorite part of the meeting area at the beginning of school is the covered alphabet cards hanging at the top. Instead of showing all of the alphabet letters at once (which can be both overwhelming and distracting when we are teaching one at a time), they are covered with a piece of construction paper. Before each letter is introduced, we guess which animal or object might be on the card (they are from the Journeys reading program). This allows them to get excited about what can be a mundane and repetitive procedure. The kids get SO excited to guess the object and I can quickly tell who understands and remembers beginning sounds and who's still learning.


Our simplified morning meeting area - schedule chart, calendar, 100's chart, place value chart, days of the week, and weather/seasons

(we LOVE PETE)


Our daily objectives 
(I have mine on wipe-off cards so I can add to the basic common core standard or create my own)
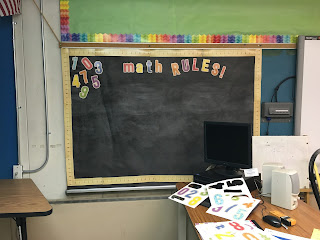
Our math display board (now covered in shape monsters!)

Our math shelf
I find that keeping the math tools open and labeled with pictures and words helps keep them accessible, exciting, and easy to refer back to (when they need help). The little bees are always digging through them at transition times and asking to play with them at choice-WIN.


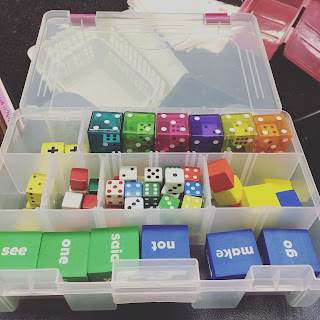
How do I store my math tools? Again, I have had them open because I have found when they are stored tightly and neatly in pretty containers, the children and I forget about them! On the left, I found what I believe is the BEST way to store our endless types of die. I got this bead box at Michaels and made sure to buy one with removable dividers so that I can fit all of my different sized die perfectly. LOVE IT.
While the children do have their own library, I always make sure our browsing bookcase holds books relative to our science, social studies and writing themes. It allows them to preview books and topics before we cover them more fully.

Some of our tables and our back wall- I LOVE the brick wall (which used to be the outside of our school building as my class is an addition). It adds so much character and rustic feeling. Can you tell that's my theme?
Here's our word wall. Now, I've tried EVERYTHING for word walls: hanging ribbons holding sight word cards, removable cards on velcro, magnetic words... BUT I finally found a system that works. Each circle pendant has one uppercase letter inside of it and is magnetized to the board behind it. This  allows me to move the letters up, down, left wherever they may need to be to allow space for many sight words under one letter category. I then take the Lakeshore primary colored library pockets and label each one with one of our sight words (using mailing labels for easy printing and sticking). Next, I take three popsicle sticks per pocket and label them with the matching sight word. Students are able to come up to the wall, choose a sight word they need to spell correctly, and then take one popsicle stick to their seat.

THIS ELIMINATES : whining over whose turn it is with each word or how long he or she has had the word. ALSO, it ensures and reinforces independence with knowing and learning the sight words. Makes writing time much more relaxed and autonomous....
Image result for lakeshore library pockets


Sorry for the blurry picture! I promise I will soon make a post all about the word wall! But here is what the wall looks like with a few of the sight words stuck up there.


Here is the back left of the classroom and our vocabulary wall- soon to be covered with words to know from the unit (i.e. tier 2 and 3 words)

OUR LIBRARY

Don't do it, they said. It will take up too much valuable classroom space, they said. The children will absolutely ruin your books, they said. Well, I did it. And I've been doing it now for years. Yes, the books (my own books used for read abounds and instruction, and also their own to browse with) are all out, all year round, and reachable for every child. The books do get more ware and tare BUT what are they for anyways? To look at once during a lesson? NO. Classroom libraries are about promoting literacy ALL THE TIME. Any interest, whenever you want. Halloween in April? Christmas in September? Chapter books without pictures even when you can't read? Yes, exposure = knowledge= excitement= motivated and advanced readers!

A view from the entrance to the library. I LOVE my new rug. I found it on amazon- Rainbow Chevron Rug

Here the students can enjoy some of their peers art work, and maybe later this year keep track of books they loved with hanging book lists? Hmm....

Then, I redid my book bins. And NO, these were NOT expensive. I got all of the bins from the Target dollar spot this past summer. They are durable, beautiful, and at LEAST half the price of all other good bins I've ever seen.


In my library, books are labeled not by DRA level, but by a category that the children can understand at the Kindergarten level. I want the children to get a sense of why and how libraries are organized in a categorized way. The categories I created for my library are: well known authors, history, science, animals, feelings and all about me, culture, songs, rhymes, math books, alphabet books, audio books, and holiday books. Some categories have more than one bin. I then labeled the bins with both a picture clue and wording and added a coding sticker at the top. Each book in the library has a color and design coded sticker on its binding. I teach the students to look for this sticker when putting the books away and throughout the year, they grow in how often and accurately they can put them away. 

Our class rules created TOGETHER. This gives them some responsibility and connection to the rules so that they know these are what they truly do agree with and promise to do.

Back shelf where my literacy and math centers are lined up and ready to be grabbed and used!
Literacy shelf set up similarly to math, open and accessible with a hanging tag explaining its contents.


Art Shelf labeled and accessible to the bees for play or choice time. Yes, I leave out glues and paints and they do choose to get messy and even sometimes make a mess by accident. But we live, we learn, and we have fun. 


Panorama of the "rustic classroom"!


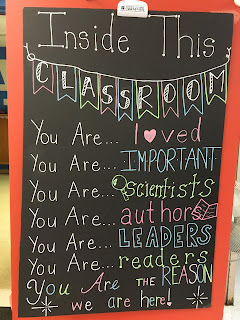
Our mantra :)

Hope you enjoyed the tour! Happy Teaching!